Time and Event List Editor

Contents
Overview
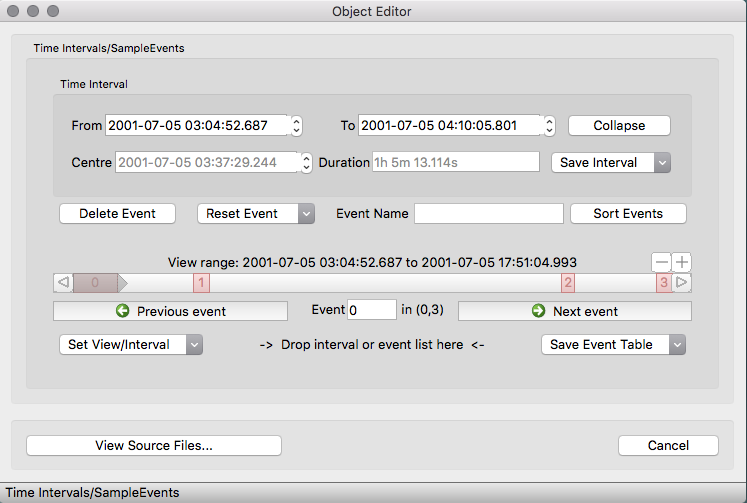
The QSAS Time Editor displays and edits time
intervals or event tables (lists of time intervals). Time intervals and event tables are
held in a separate segment of the QSAS
Working List on the Main Window.
The time editor will show extra fields when a time interval sequence
is being edited, but otherwise intervals and event tables work in the
same way.
Note, however, that all drop sites expecting
a time interval will also accept a time series object.
Time Interval Interface
Time interval editors can be found in multiple places in
QSAS: when adding or editing a time interval, but also to specify an
axis range in a plot or a selection range in the Data selector for
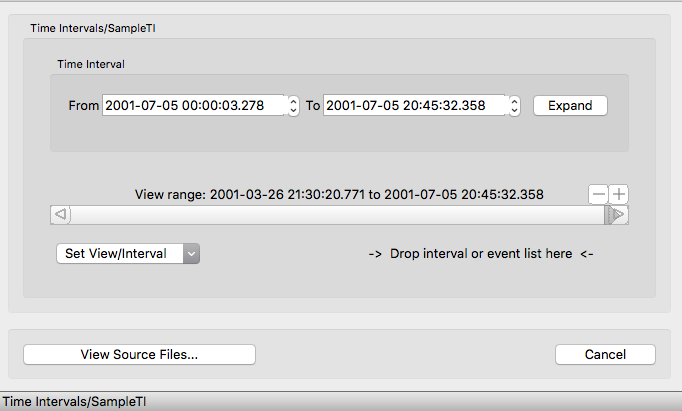
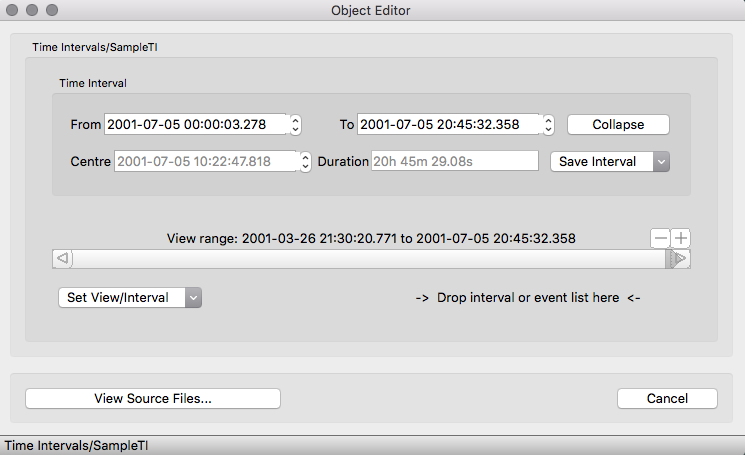
example. The time editor can appear either collapsed or expanded, as
shown in the following pictures:
- Collapsed:

- Expanded:

Time Interval Fields
If the fields are collapsed, only the "From" and "To" fields
are displayed, and the "Centre" and "Duration" fields are also
displayed when the expand button is selected.
-
For the "From", "To" and "Centre" fields, QSAS uses ISO Time Strings (e.g., "1984-10-28 08:54:37.500"). They can be
edited either by typing in new values for the fields, or using the Up and Down
Arrow keys.
-
Durations are specified as any combination of "d h m s" (day, hour,
minute, seconds) fields, e.g., "2d 4h 23m 1.25s" or "4.5h" (or even "4.5h
10m" is valid and will be sanitised to 4h 40m)
-
At any time, only the two last selected fields are active ("From" and "To" by default). To
select a new field, just get click it or use the tab key to cycle fields. For example,
if you wish to select a 2 days time interval centred on "2001-02-03", click the "Centre" field,
type in this date, then click the "Duration" editor and type in "2d". The "From" and "To" fields
will be filled in automatically if the entries are valid.
-
Dragging and dropping a time interval or a time sequence object on the editor auto-fills the
editor with the values of the dropped object (boundaries defined by the first and last items, for time
sequences). Dropping one of these objects on a time slot ("From", "Centre" or "End"), will change
the value (using the start, end or centre time of the dropped object, selected by a pop-up menu).
- The currently set time interval may be saved using the Save Interval
pulldown. There are choices for saving the interval as part of an event
list or as an interval object on the Working List. If the editor is
being used on a single interval, then the options Save current event and Save interval on WL have the same effect of modifying the object on the WL currently being edited.
View Range and Events
The lower portion of the window initially shows the interval
for a single interval object, and the full range for a sequence of
events. The current interval is shown shaded on the range slider. This
slider is convenient for moving a small interval within a larger range.

-
The grey bar represents the same time interval as
the time fields. Its ends can be moved (click+drag on an end), or the
whole bar can be moved (click+drag in the middle of the bar). Clicking
to the left or to the right of the bar steps the interval by its
duration.
-
Red bars appear when editing event tables: each bar
is an interval in the table. Double-clicking an events sets the current
interval to match that event. Browsing events can be done using the
"previous event" and "next event" buttons.
-
The view range can be altered by clicking the "+"
(zoom in), "-"(zoom out), "left arrow" and "right arrow" buttons. The
arrows step the whole view range by half its duration, to the left and
to the right.
- Both the interval and range may be reset to their original value when the editor was opened via Set View/Interval. It will also launch a new interval editor that can be used to set the full View Range of the slider.
- An Event Table may be saved to the working list.
- Dropping an object with associated time interval (time series or
interval object) on the bottom of the panel sets the current interval to
that of the dropped object.
Tips/FAQ
- Selecting "Duration" and then editing "Start", "Centre" or "End" can be used to slide a fixed time interval.
- Selecting "Centre" and then editing "Start", "End" or "Duration" can be used to shrink or expand a time interval.
Last up-dated: october 2016 Tony Allen


